Contracts Module
Create and assign contracts to employees.
 ContractsHow To Video
Module Description
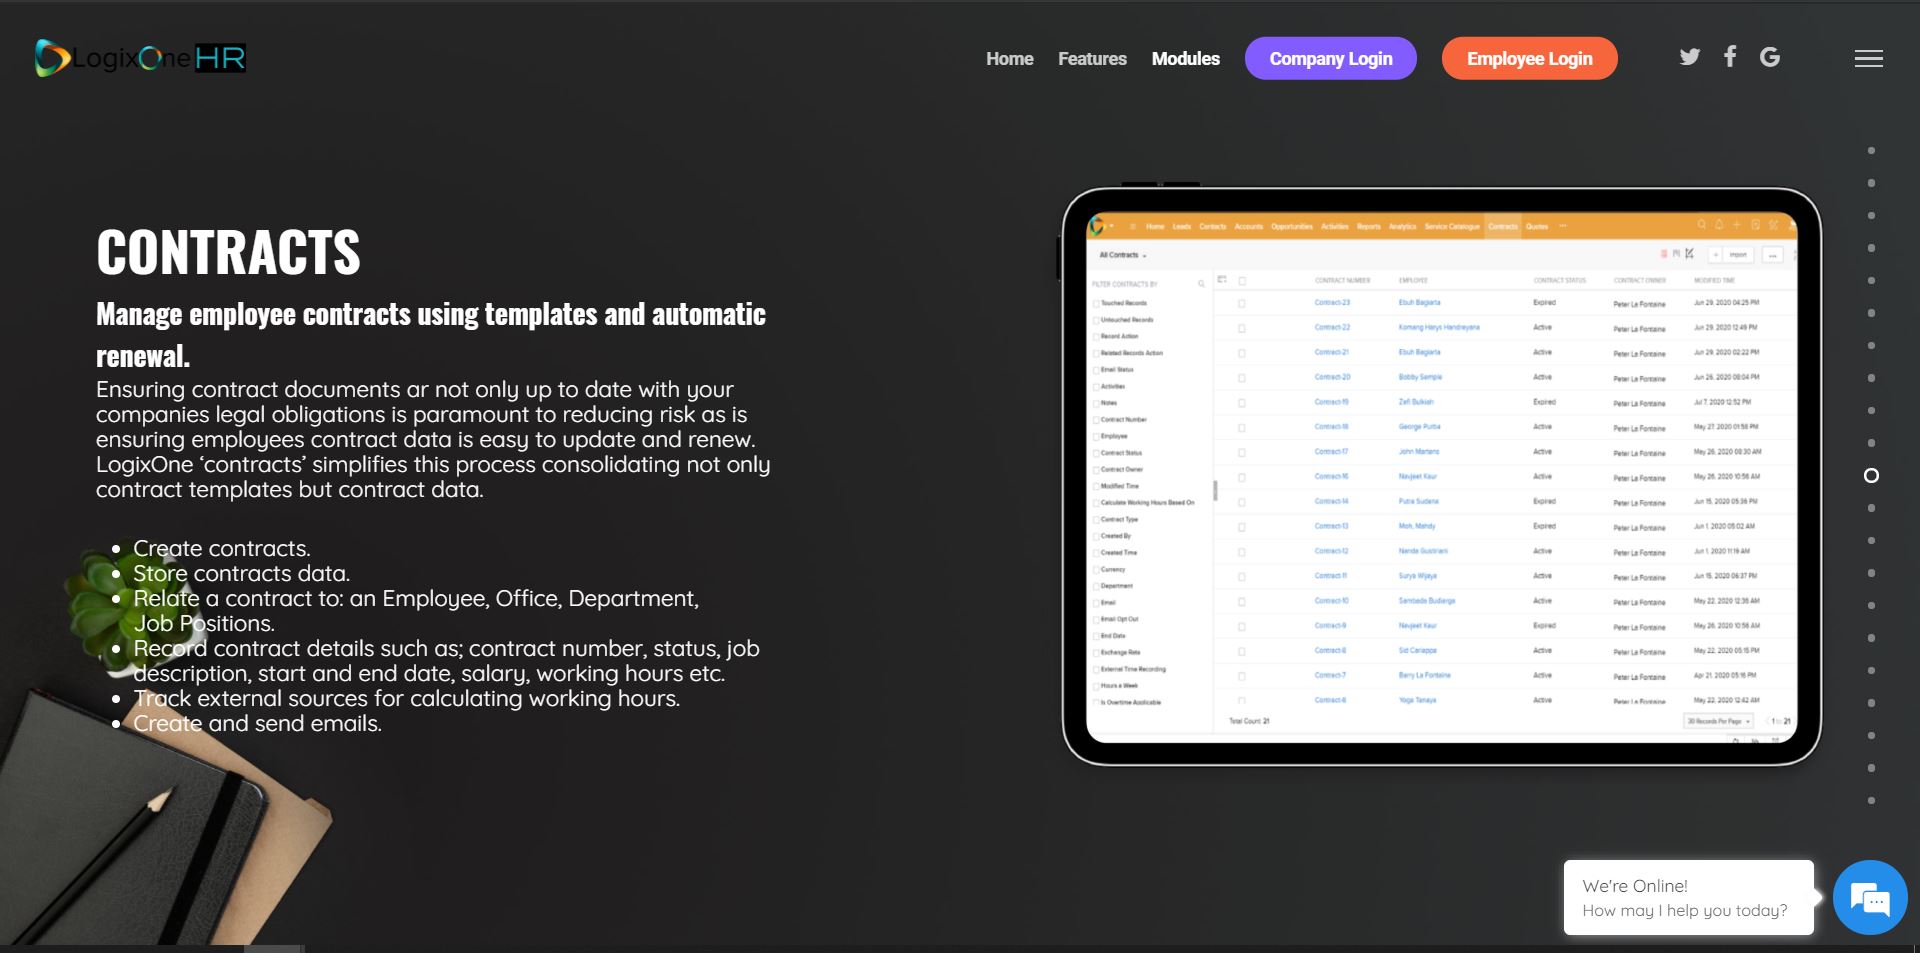
The Contracts Module stores individual contract agreements between employees and the company. Each employee is hired under their own terms and conditions and these are contained in the contract record that is associated to that employee. Even though, contracts differ on a per employee basis, contract 'templates' can be made to streamline the process of creating and sending contacts to each employee.
Each contract includes comprehensive information about job details such as job title, job level and job location etc. This contract can then be emailed to the candidate or employee via a 'mail merge' functionality thereby ensuring both the company terms and conditions and the employees uniques contract terms and sent. "Finalised' contract documents are stored for future reference.
Module Features
- It validates the HR Managers to create new contracts and assign the contracts to current employee.
- The laws of contract are similar for each employee, yet they are significantly non-identical.
- It allows the HR Managers to create a unique ID number for a new contract, which is further connected with employee profile .
- It authorizes the HR Managers to make operations such as fixing an expiry date for the contract bond. The status of the contract is changed from 'Active' to 'Expired' afterwards.
- It supports contract information such as job title, position, department, contract type and salary details of an employee.
- It has enlisted numerous ways of employee's salary pay period. Eg: hourly, weekly, fortnightly, monthly and annually.
- A contract is mentioned with start and end date of the agreement to estimate the total time of enforcement.
- The HR Managers has liability to send emails to the contract claimant.
Creating a Contract
- Navigate to the "Contract" module in the main menu.
- Click on "+" button to create a new contract.
- Using the field "Email" enter your email address under "Contract Information".
- Enter job title in "Job Title" Field. Eg: Marketing assistant in the production department.
- Select your job department from "Department" field. Eg: Accounting, sales, finance, operations etc.
- Select your salary paying period. Eg: hourly, weekly, fortnightly, monthly etc.
- Choose level of the job from "Level" field. Eg: Executive manager, manager, senior executive staff, supervisor etc.
- Enter the salary amount an employee will be paid as per salary pay period. This field fixes the amount that has to be paid to an employee for the probationary period.
- Select the employee from "Employee" to be contracted. It is a lookup field that looks up for all employees enrolled in the organization. You can either select from the list of employees or create a employee by clicking "+ New Employee".
- Select the reporting manager from "Report to" lookup field under "Contract Details". It looks up for all the employees working in the company. You can either select from the list of employees or create a new employee by clicking "+ New Employee".
- Select a start date of contract from "Start Date" calendar. The default format is MM/DD/YYYY. For instance 05/25/2020.
- Enter working days of the employee in a week in "Normal Working Days Per Week". For instance a full time employee works 5 days a week.
- Choose the status of contract from "Contract Status" field. For example contract status for new employee should be "Under offer". For familiar employee contract status changed to "Active". After last date of contract the status of contract is changed to "Expired".
- Choose your option from "External Time Recording" to verify whether the working hours are calculated from external sources other than the contract agreement. For example state of the art companies install digital devices or applications to record their employees working hours digitally.
- Select job position from the "Position" field. Eg Accountant, area manager, admin operation etc.
- Enter daily working hours in "Normal Work Hours Per Day". Eg 8 hours.
- Describe the job in "Job Description" field. It enlisted the job duties and responsibilities an employee is going to perform. For example a Test Analyst job is described as preparing test case, performing tests and making reports.
- Choose contract type from "Contract Type" list. Eg: contract, permanent, casual etc.
- Select your option from "Is Overtime Available" to affirm or deny to work more than contracted hours.
- Select your office location from "Place Of Employment" lookup field. You can either select from the list of offices or create a new office by clicking "+ New Office".
- Select end date of contract from "End Date" field. "End Date" calendar format is MM/DD/YYYY and end date of contract can be extended in future.
- Select the contract start date from "Start Date Based On". You can set the start date of contract either by choosing the date of joining or by the start date of current contract itself.
- Enter normal working hours of a week in "Hours a Week" field. Eg: For working 8 hours daily for 5 days is equal to 40 hours a week.
- Select a source to record working hours of an employee from "Calculate Working Hours Based On" field. For instance employees put down their clock in and clock out timing in LogixOne Staff application.
- Click "Save" to save the details.
- Click "..." button, then press "Mail merge" to open the contract document.
- Go to "File" button, click "Download as" .docx, pdf etc to save the contract document.
- Go to "Employee" module and click an employee from employee list.
- Attach the contract and using the "Send" button send the contract to the claimant (employee).
Attachments
The "Attachments" section stores all mandatory documents or files uploaded related to a job.
Steps to attach Attachments
- Click on "Attachments" under "RELATED LIST".
- Press "Upload File" to upload a file by scrolling down the "Attach" option.
- Click "Documents" option to to select documents from uploaded file.
- Append a link in "LINK (URL)" option.
Emails
The "Email" area stores all the emails received by an employee related to his/her job.
Steps to Create an Email
- Browse through "RELATED LIST", click "Emails".
- Click "+send" button or "send" button "Edit" button.
- Enter subject name in "Subject" field.
- Choose the template of email from "Choose your Template" button.
- Insert a survey link from "Insert Survey Link" button. (Optional)
- Type in your mail or message inside the text field below "Subject".
- Add attachment if required.
- Click "Send button" to send the message.
Open and Close Activities
The "Open Activities" section allows HR Managers to create activities such as calendar events, tasks and calls and assign those activities to an employee.
"Closed Activities" are activities that fall in the past.
To see a full description on how to work with "Activities" click here.
Related Articles
Contracts Module
Create and assign contracts to employees. ContractsHow To Video Module Description The Contracts Module stores individual contract agreements between employees and the company. Each employee is hired under their own terms and conditions and these are ...Employee Module
Manage employees. Employees Module How To Video Module Description The Employee Module displays all 'employed' and contracted employees within the organization. It stores all the professional and personal information such as ID number, ...Employee Module
Manage employees. Employees Module How To Video Module Description The Employee Module displays all 'employed' and contracted employees within the organization. It stores all the professional and personal information such as ID number, office ...Leave Profiles Module
Create Leave Profiles that meet your companies leave entitlements policies. Leave profilesHow To Video Module Description The Leave Profile Module accommodates enables HR Managers to create leave types that meet their company requirements. Examples ...Leave Profiles Module
Create Leave Profiles that meet your companies leave entitlements policies. Leave profilesHow To Video Module Description The Leave Profile Module accommodates enables HR Managers to create leave types that meet their company requirements. Examples ...